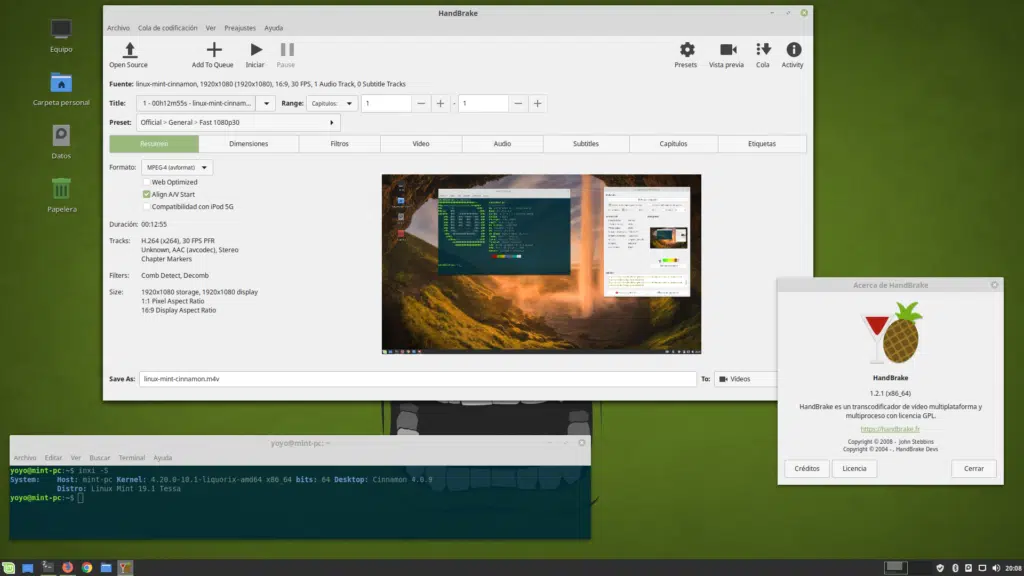
HandBrake is defined as software that has been designed to convert videos into various different formats. It is a program that is part of Windows and, at first glance, we can recognize it as nothing more and nothing less than a free tool suitable for all users.
Currently, it is considered one of the best free tools for video conversion and format editing with just a simple click. The software was originally designed in 2003 by the programmer Eric Petit, and upon its release, it was quickly embraced by other systems such as Linux, Windows, and MacOS.
In terms of its performance, it is characterized as a very user-friendly software with several functions integrated, including the ability to modify the dimensions of certain video formats.
In short, this program has been widely used by many internet users and is already a great option for manipulating formats according to our preferences.
Converter
HandBrake features a video converter where we can encode and modify our favorite videos into different formats, such as MP4 or MKV.
We can also customize our conversion settings, which is much more convenient and practical. Moreover, it not only allows us to convert videos but also to edit them. When it comes to editing, we can specify some of the most important elements, such as fonts, images, filters, etc.
Video Digitization
Another feature of this program is that we can digitize videos since it includes a DVD ripper.
In this case, if we want to extract and digitize a specific video, we only need to specify the video codec we will use, such as H.264, and also take into account aspects like frame rate and quality.
How to use it : Step 1

We will start by choosing the most suitable video source for us. In this case, we will try to download and install HandBrake on our device. To download this program, you simply need to enter its name in any browser, and you will directly access a small download link where you can download it for free and without any issues. It doesn’t require much memory since it is a tool that doesn’t take up much storage space.
Once the program is installed, we run it and then go to the “Source” option located at the top. Once accessed, you will have two options to choose from. These options include “File” (to convert video) or “Folder” (to select a specific disk).
You just need to select one of the displayed sources, and then you will enter a new screen.
Step 2
Configure the Output To select the output destination for our work, we need to go to the “Browse” option, and in this way, we just have to choose a specific hard drive from the folder.
Once the destination is chosen, all that’s left is to select a preset from the list, which is usually located on the right side. This list will include a range of presets, from high-profile and normal ones to Universal TV presets, allowing you to preview them on other devices.
We are left with only the final step, which in this case is just clicking the button to start the encoding.
In case you have more than one video to convert, you can add them to the queue, where you will simply need to activate it in the option to show the queue.
These have been the first steps to start using HandBrake from scratch. It is recommended to watch more tutorials that will take you even further with this program. Furthermore, it is one of the programs that allows video editing, so you can easily and quickly modify and format your videos.
HandBrake has become one of the leading tools for video encoding and conversion. Currently, the vast majority of internet users opt for this excellent option, where you have access to endless functions that will be of great help.
We hope that you have learned something more about this program, a program that is at your fingertips with just a simple click.


